Monday, May 27, 2019

Memorial Day Stitching


I can't think of a more appropriate stitching project for our Memorial Day weekend.  I started on this with my Bestie, Leslie Jackson, on November 17, 2018.  I am using all the called for floss with one substitution with the beads.  It is being stitched on the Declaration of Independence written by my Uncle Thomas Jefferson, yes I am descended from greatness!  I am related to the Adams also, they are cousins, John, Samuel and John Quincy. Henry Adams, their grandfather is my 13th great grandfather thru his son Peter.  I am so proud of my heritage.  Anyway here is a picture of my beginning on May 26th.


Here is a picture of my ending on May 26th, 2019. On the left I began filling in more of the flag and top left I began her elbow in over one.  The red gridding thread is the center of the whole project, horizontal and vertical.  I have extended the flag a bit over the horizontal line.  

Progress is slow but I am not in this for speed but for joy and peace in my life.  Stitching is my mantra!  God Bless you and God Bless America!


Saturday, May 11, 2019

Spring bling stitching

Yes indeed, I have been stitching.  I am enjoying some lovely small Spring projects, let me share them with you.

We had a very long, cold, snowy winter like many people in the Midwest.  It has been many years since we had seen such a winter.  I was chomping at the bit for Spring and wanting to feel the warmth of the sun on my face.  Our spring has come but has been wet and damp with a few really lovely days.  Not many truly good sunroom stitching days have been seen.


I have 3 spring designs completed.  The top design on yellow fabric is a Lizzie Kate kit design called "Easter".  I did not stitch it on the supplied Aida, I stitched it on a 28 count linen called "Lemonaide" which was from a now defunct company called "The Dye is Cast".  It is close to the DMC color 445.  I used a combination of DMC floss and "The Dye is Cast" hand dyed floss.  I loved the orange carrot color I used it in the next design I stitched.  The picture below doesn't accurately reflect the yellow fabric.  It is really a cheerful and warm yellow.  I wish Brenda was still hand dying her fabric line.


The next finish was an old free design from "Mosey 'n Me", called "Surprise".  Everytime I would peruse my free designs I would think, "I need to stitch this some day!"  Well some day came and I am in love with the results.

The fabric is a 28 count Quaker linen from the Silkweaver Signature Series.  It was a limited edition color and is an aqua color similar to DMC floss color 3811.  It is a very spring like color.  The design has no color choices but tells you to pick your own.  I chose the carrot color from the defunct "The Dye is Cast" that I used in the above Lizzie Kate design.  The tea rose colored heart and the green carrot leaves and the rabbit, his nose and ears were also hand dyed fibers from the defunct Dye is Cast.  The back stitching is DMC, a dark brown color.  I used black beads for his eyes.  I have to say the backstitching makes this design come to life.

This last finish has to be my favorite.  It is also a free design from Mosey 'n Me! The fabric is a 28 count linen again from Silkweavers Signature Linen in the color called Plum. It is similar to DMC floss number 554.  I used the same floss colors from the defunct "The Dye Is Cast" for this bunny head as I used in "Surprise".  I used DMC 310/black for the back stitching.  This design only had the nose and mouth graphed for back stitching but I felt that it definitely needed some defining to bring out the cute face.  I tried to emulate the style of Mosey 'n Me backstitching that was used in the graph of "Suprise" and wow!!!! I was so pleased with the results.  Again I used black beads for the eyes.  The neck bow was graphed and I stitched it however in a stroke of serendipity I had purchased these sweet little girl bow hair clips.  Carefully I removed the bow from the clip and tacked it on over the stitched bow.  This just brings out the charm of this small little design.  It really doesn't get much cuter then this design!  I am proud of myself!

I have started a free design from "Alita" designs called "Chick and Flower".  I am stitching it on a 32ct Belfast linen in a robin egg blue color which DMC has no accurate color of.  The picture of the blue fabric in the hoop needs some green to it.  It is a wonderful bright and cheery color.  I am using the called for DMC colors but there isn't a really discernable difference in the yellows as the graph picture shows.  I think I may use a darker yellow or orange to back stitch the wing.  I started this on 4/29/2019 but have stitched in fits on the weekends.  

So that is the stitching happenings here in my Happy Room.  I hope all your stitching is lovely and joyful.  Break out your experimental nature and embrace some creativity, you just may surprise yourself!  I did! 

What do 15¢ and YouTube have in common?


I bet you are wondering what 15¢ has to do with a stitching blog, well let me tell you.

As many of you know I had a You Tube channel called "Sunroom Stitcher" in the Floss Tube community and I enjoyed sharing what was going on in my neck of the woods.  I made many friends and was inspired all the time and showed it in a way that had me spending lots of money each month on stash.  However I noticed it was a trend not only with me but with others also.  I honestly do not believe mine was ever intended to part of a contest.  However with others it was.

Then one day a troll reported me to You Tube and my account was terminated.  Without an investigation into my heinous behavior (pun intended), all my videos were gone.  To this day I cannot figure out what about my stitching was in violation of the community guidelines.  I didn't dwell on it too long.

 This account has been terminated due to multiple or severe violations of YouTube's policy against spam, deceptive practices, and misleading content or other Terms of Service violations.

I began looking at the floss tube videos in a different light and saw the sameness of most of them.  You know the ones, the ones where most of the video is dedicated to what stash was bought.  There are also the ones whose homes are so "decorated" with stuff you can't focus on anything else.  Yes Easter, threw up all over their home, then Valentine's Day threw up all over their home, then July 4th threw up all over their home, then Halloween threw up all over the inside of their home and spilled out into the yard.

I was also appalled by the behavior of these stitchers who suddenly likened themselves celebrities, drinking at retreats, begging for money for their honeymoon and verbally attacking people in wheelchairs.  No longer did I want to be associated with any of them. I wanted to stop my madness and really enjoy what I had.

I rarely watch videos anymore, very rarely.  There are some lovely Floss Tubers who I catch from time to time such as Kitty Stitcher/EDS Warrior, Vonna Pfeiffer and A Stitch Too Far, Carolyn Mazzeo (no longer making videos) and Mrs Milky Bar Kid.  I know there are a couple others that I failed to mention.

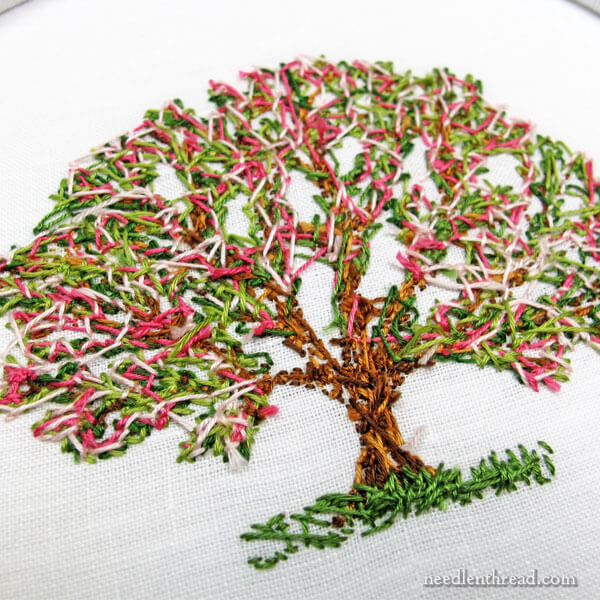
I today am enjoying my stitching and buying little to no stash which is fabulous.  I stitch with what I have and occasionally purchase a skein of floss.  I still look for freebie  designs but have actually stitched free designs I have had for 20+ years.  I am loving saving money to have my roof fixed, my husband's dental work done and I look forward to buying a new pair of eye glasses.

15¢ does matter, it matters here and there and it adds up to bigger savings.  15¢ just doesn't stay 15¢ either, it becomes 30¢ and then a dollar and on and on until I am trying to keep up with the Janes and Josies on Floss Tube.  I blame myself for being part of it but I am done with it all!  Please read Mary Hunt's article below, it may open you up to a more promising future and enjoying what you have at this very moment.


Share
Tweet
Pin
Forward

Why 15 Cents Matters

By Mary Hunt on 06/26/17


I used to think that small amounts of money didn’t matter. What difference could $5 here or $10 there make when we were more than $100,000 in debt (not counting the house and cars)?
So what if I increased our debt by such a small amount—it wouldn’t really matter because we already owed so much. I used the same argument for not paying anything more than the minimum monthly payments on our credit cards because that too would make no difference.
Boy, did I have a lot to learn. The truth is that we five-and-10-dollared ourselves to death. It was the little things that added up to create a huge monster. Thinking that the little things didn’t matter freed us to think $2, $5 or $20 didn’t matter … then $50 didn’t matter, and on and on it went.
Ironically, it was the little things that turned us around, too. Sending an extra $2, $5 or $20 every month to rapidly repay the debt we were targeting helped us find a way to make the payment $22, then $35 and soon a $100 payment became standard.
I’ve had people look at me like I was a little weird when I suggested they should not use a first-class stamp on a postcard. I mean, does 15 cents really matter? I think it does, not so much for the dime and nickel, but for the attitude. You see, if you casually throw 15 cents away when it comes to a postage stamp, it’s much easier to begin thinking slightly larger sums don’t matter, either. And soon you’ll be on your way to thinking $20 is not a big deal. Then you’ll be headed for trouble.
Yes, my friends, 15 cents does matter. If you understand that, then $1.50 matters and $15 will matter even more, and on and on right up to $15,000.
Some wise person once said, “Watch the pennies, and the dollars will take care of themselves.” I have proven that to be true and I hope you can, too.
Here are three easy ways to stash cash:
Coins. Don’t spend them. Save them, instead. Every evening, empty your pockets, purse and wallet of all coins. Even if the bill comes to $4.05, hand the clerk a $5 bill and stash the difference. When you accumulate $25 or so, roll, wrap and send them off to your savings account.
Windfalls. No matter how small, make it a habit to bank all coupon savings, rebate checks, refunds and other “found money.”
Save an extra 10 percent. Stash 10 percent of your pocket money, grocery money and any other “walk around” funds you control in your secret savings spot. Chances are you won’t even miss it. But soon you’ll discover that $2 here and $4 there really adds up.
This column Why 15 Cents Matters is today's post at Mary Hunt's Everyday Cheapskate blog, where you can add your comment!


Recent posts on Everyday Cheapskate:

Great Recipes Know No Season
Ask Me Anything: Oven Door, Window Air Conditioners, Hardwood Floor Cleaner
Keep Your Cool in the Heat of Summer
Stop Whining!

Mary Corbet's 2¢ on needlework backs and underwear

This was another article in my e-mail archive I had saved.  It is a great article!  I will never show another stitcher my underwear EVER again!!!  LOL!!!!


Visit Needle 'n Thread!
www.needlenthread.com
2017-05-31 07:30:00-04
I have a rule about the back of embroidery – and it’s pretty much the same rule that applies to… well, underwear.
Today, let’s chat about the backside of hand embroidery projects – perspectives and opinions, circumstances that might change your approach, and practical tips!


The Back of Hand Embroidery: Opinions, Perspectives, Practical Tips

If you’ve been out and about in the needlework world, you’ve probably met stitchers who are obsessed with the back of needlework.
Never use a knot! they tell you.
Never carry your threads! they exclaim.
Check the back every few stitches! they cry.
The back’s a mess! they chide.
Approaches like this can be pretty disheartening, can’t they?

The Back of Hand Embroidery: Opinions, Perspectives, Practical Tips

Perspectives & Opinions

Perspectives and opinions on how the back of embroidery should look are numerous and varied.
There are those who believe that the back should always look as good as the front.
There are those who believe that you can never use a knot.
There are those who contend that the neatness of the back of embroidery indicates a good stitcher or an inferior stitcher.
On the other hand, there are those who never give the back of their embroidery a second thought, which can sometimes lead to disappointment in the finish.

The Back of Hand Embroidery: Opinions, Perspectives, Practical Tips

A Few Guidelines

When it comes to the back of embroidery, a few guidelines can set you up to achieve a neat back – especially when it’s necessary – and can increase your stitching pleasure considerably by eliminating too much worry over what’s going on on the other side of the hoop.
If the back of the embroidery will be visible in a finished item (think: tablecloth, towel, hankie), you’ll be much more pleased with your finished result if you’ve taken some pains to keep things neat.

Tips for a Visible Back

1. Consider using a waste knot and tacking stitches to start lines or filled areas of embroidery. This will eliminate bumpy knots and their subsequent tails on the back of the work.
Here’s a tutorial for using a waste knot and tacking stitches on a line of embroidery. The same principles apply to filling an area of embroidery. And, similarly, tacking stitches can be used to end a thread, by working them in an adjacent area that will be covered with embroidery.
3. Avoid carrying threads to a new starting point across the back of the work in areas where there is no other stitching.
3. If you do need to carry a working thread a short distance, and there are other stitches in the area, whip around the backs of other stitches to travel your thread to a new starting point, instead of carrying a thread any distance with no anchoring. Carried threads can become loose and snag on things, so it’s best (and it looks neater) to secure them by whipping them into adjacent stitches on the back of the work.
Here’s a tutorial on traveling a thread to a new starting point.
3. If you need to work isolated stitches like scattered French knots that are a considerable distance apart, start and end the thread for each isolated stitch.
Here are some tutorials for working isolated stitches like French knots:
Isolated French knots – Part I
Isolated French knots – Part II
4. If you end up with a slip knot on the back of your work that you don’t notice until much later, this tutorial will show you how to remove the slip knot, secure the ends, and neaten the back of the work.
5. To end your threads when there’s nowhere left to work some tiny tacking stitches that will be covered by other embroidery, either run the thread under the backs of your nearby stitches or whip the thread around the backs of nearby stitches. You can even work a little half hitch around the last stitch you whip around or pass under, if you need your thread to be extra secure (for laundering items, for example).
Here’s a tutorial on ending threads.
6. Trim the tweakers! When you’re finished with the piece, go over the back carefully and trim any tweakers, or little thread ends that are poking out beyond your embroidered lines and edges.

The Back of Hand Embroidery: Opinions, Perspectives, Practical Tips

If the Back is Not Visible…

If the back of the embroidery is not going to be visible in the finished work (think: a framed piece, a pillow cover, a quilt, a finished item of any sort with a backing behind the stitching), then ask yourself:
1. Is your ground fabric transparent to any extent?
2. Is the stitching on the front smooth, flat, and lacking texture, or is it raised, textured, bumpy or heavy?
Here are some tips that will lead to an overall better finished look on the front if you’re working on a lightweight fabric or relying on a very smooth surface on the front:
1. Don’t carry threads from one area of stitching to another, across a blank area (see the points above on visible backs). If carried threads can be seen from the front, the finish will look sloppy.
2. Use the same starting and ending techniques discussed above.
3. Don’t forget to trim tweakers!
If the fabric is moderately heavy in weight and completely opaque, or is backed by another piece of fabric, or if your stitching is heavy with texture, here are some tips that will make your stitching easier, more efficient, less worrisome, and perhaps even more pleasurable:
1. A thread carried a short distance that won’t be seen from the front is no big deal.
2. A knot that isn’t big enough to cause a bulge on the front of your work is no big deal, so yes, you can start your embroidery with a knot, if it’s easier for you!*
3. Tweakers are no big deal.
4. And if you get a slip knot and it’s fairly tight and secure, you can whip over it and leave it, or just leave it. Who’s going to ever see it? If, however, you’re afraid it might loosen over time, you can secure it (see the tutorial linked to above).
*Regarding knots: keep in mind, some threads don’t hold a knot as well as others. Synthetics, silk twists & perles, and some cotton perles can be finicky about holding a knot well. But if you’re using regular cotton floss, spun silk, cotton floche and the like, go for it!

The Back of Hand Embroidery: Opinions, Perspectives, Practical Tips

What it Boils Down To

As with any art, craft, or hobby, the last thing you want to do is diminish the pleasure the artist, crafter, or hobbyist takes from the pursuit.
If rules, regulations, and the opinions of others about the way the back of your work should look diminish your pleasure in stitching, ignore them!
If, however, you are anxious about how the back of your embroidery looks, use the easy and practical tips above as common sense guides to improve the neatness of the back of your embroidery without going to obsessive extremes.

And the Underwear?

Asking to see the back of someone’s embroidery is a lot like asking to see someone’s underwear. The whole point of clothes is the outer layer – that’s the part that’s seen and appreciated. Asking to look at what’s underneath the clothes – well, that’s just a little weird and more than a little intrusive!
I’m sure there’s an unwritten rule somewhere, that goes something like this: Never ask to look at someone else’s underwear.
I never have. And I’ve never asked to look at the back of someone’s embroidery.
Don’t sweat over the back of your embroidery! If it needs to look neat, take some simple measures to accomplish that.
If it’s never going to be seen and it doesn’t interfere with what’s seen on the front, then…
…in the scheme of things…
…relative to All the Significant Concerns of Life…
who really cares?

Questions? Comments? Suggestions?

If you have any easy and practical tips you’d like to share about keeping the back of your embroidery neat, or if you have any questions or comments to add to the conversation, feel free to chime in below!
For the sake of covering all the bases, sometimes, when embroidery is being professionally judged or evaluated, the back is carefully scrutinized. There are also types of embroidery that rely on a perfect back (like two-sided embroidery). This article focuses on stitching for pleasure, not questions of professional training.