
Friday, April 27, 2018

Previous 2018 finishes

Good morning stitching lovelies!  I thought I would share a couple of stitching finishes from earlier in the year.

This is the Little House Needlework's monthly series.  I had intentions of stitching one a month but then a job happened.  I intend on finishing this to sit within the tablescape on my dining room table.  You might be surprised how such a small, simple looking design can be so complicated.  I thought that I was good at counting but was humbled time and again by the counting, especially on the snowflake in the upper right. But I adore the cardinals.

FullSizeRender.jpg

Pray More is a free design that was offered by Lizzie Kate.  I used the Olde Willow Threads which are no longer available.  I have a drawer full of them and I love the vintage or primitive shading of them.  I have stitched this to go into an adorable tray which will be further cute-ified with some vintage print fabric for a backing and bow and a spray of sweet artificial spring flowers.  It is a labor of love for my best friend Leslie.  The best thing about the design is it would look lovely in any choice of colors.
IMG_1305.JPG

So that is it for now.  This weekend is forecast to be splendid and my tentative plans are to spend the entire weekend in the sun room stitching up a storm.  Leslie may join me via Skpe (she lives in Scotland). Until next time, may God keep you safe, filled with peace and stitching with joy!  Sandi Jo

Wednesday, April 25, 2018

No More You Tube

Dear and gentle stitchers, it would appear that my cross stitch videos on You Tube were far too coarse and vulgar as I have had my account closed and videos deleted due to violations of the community rules.  I shake my head and just wonder what in the hell is going on over there.

Do not mourn, weep or panic my gentle friends.  I plan on making my stitching videos and posting them here, on my blog.  I am finding that this world is going plum crazy and I need to rein in my time on the internet.  It steals a lot of time when I could be doing something wild and crazy like reading, baking, stitching or just plain day dreaming.

You can subscribe to get updates on my blog entries so you will never miss an opportunity to see my fat face in the privacy of your own homes.

I will continue to update freebie sites I find, as well as sites stitchers may find interesting and inspiring.  I want to have give aways and hope to post photos of yours and mine on my freebie design page on this blog.  Everything is a work in progress on this new Sunroom Stitching adventure.

I promise to be silly and share my life, my stitching and my love of God with all you wonderful people.  We will see you very soon.  Sandi Jo


Sunday, April 15, 2018

Re-homing found needlework

I wanted to share a couple of rescued cross stitch pieces that I found at my favorite thrift shop.  The stitching is perfect and I know they were stitched and given with love.  I believe both were stitched by Tracy who wrote a message on the back of one of them.


File May 18, 11 47 34 AM.jpeg
Kiss the Cook is very sweet and looks perfect in my kitchen.  I paid $1.00 for it.

File May 18, 11 46 36 AM.jpeg
I love the frame as well as the design.  It is well stitched and have an idea it may have been a kit as the frame is perfect for the shape of the design.  There are a few little nicks in the frame but I think it gives it more character.  I paid $2.00 for this piece.

File May 18, 11 47 04 AM.jpeg
Here is a close up of the stitching.  It is well stitched.

File May 18, 11 46 52 AM.jpeg
Here is the sweet loving message from the stitcher Tracy, to her mother.

I am thrilled to have found these sweet pieces and I am proud to have them displayed in my home.  No one appreciates stitching more then stitchers.


Sunday, April 8, 2018

The more the merrier!

My stitching time has been drastically cut by the advent of my new job, which I love by the way.  It has been quite a while since I shared what I have finished, started or just plain forgotten about.

Life has been wonderful here in the gentle folds of our beautiful Lilac Thicket.  All are healthy and happy and forever blessed by our Heavenly Father.

2018-04-08 12.21.21.jpg
This is my latest start and it will be gorgeous when it is complete.  It is a free design by Ann Logan at https://www.cross-stitch-pattern.net/ .  She has hundreds and hundreds of wonderful designs.  This one is called "Pink".  Here is what the design looks like: Pink
Isn't it lovely?  I am stitching it on a light pink lugana 28 count, which I had in my fabric hoard.  Ann also has a free design called "Blue Garden" that I would like to stitch in the future.

2018-04-08 12.29.54.jpg
This project which is almost done and I got bored with it, is called "Stirring up a sweet Christmas".  It is an old design ©1998 by Waxing Moon Designs.  This Santa is stirring up sweet treats for Christmas on 32 count Opalescent Belfast linen.  I have used a combination of the called for floss colors and DMC substitutions.  I have collected several buttons to replace those called for.  Instead of stitching the wooden spoon, I have fashioned a wooden spoon from Sculpey clay which will be attached.  He is very cute and definitely a new look for Santa.  The design size is 61 by 92 stitches.

2018-04-08 12.36.54.jpg
This piece has not been worked on in a while.  It is a JanLyn cross stitch kit called "Buck's County Farm Stand".  It will look like this when finished: Buck's County Farm Stand - Cross Stitch Kit
The finished size is 16"x12".  It really speaks to my Prepsteading heart.  If you don't know what "Prepsteading" is it is a combination of prepping and homesteading.  If I was 41 years younger I would be buying a piece of land in the Missouri Ozarks and building my own cabin and growing my own food.

2018-04-08 12.33.30.jpg
These little sweeties are from Brooke's Books Publishing and they are free designs in her Advent Animals series.  I am stitching them on Reflections by Silkweaver 28 count lugana in the color "Beach".  The green and red fabrics are the fabrics which will back the individual pillows which will hang from the dining room entrance way.  They are just the most fun to stitch.

2018-04-08 12.22.38.jpg
This is a finish from earlier this year.  It is from Snowflower Diaries series "Joyful World".  The fabric is actually a green hand dyed lugana which was in my fabric hoard.  It was fun to stitch and one day maybe finished to occupy a dining room tablescape.  I forgot to mention, this is a free design offer.

So for now I will sign off and will add more works in progress or finishes as I find them.  They tend to hide all over my happy room.  May this beautiful spring time bring you renewal to your stitching soul.

Friday, January 5, 2018

Make Perfect French Knots

A wonderful tutorial on making those dreaded French Knots from Mary Corbet.  She gives wonderful hints for making those little boogers uniform and perfect.  Here is article she shared on her website.

www.needlenthread.com
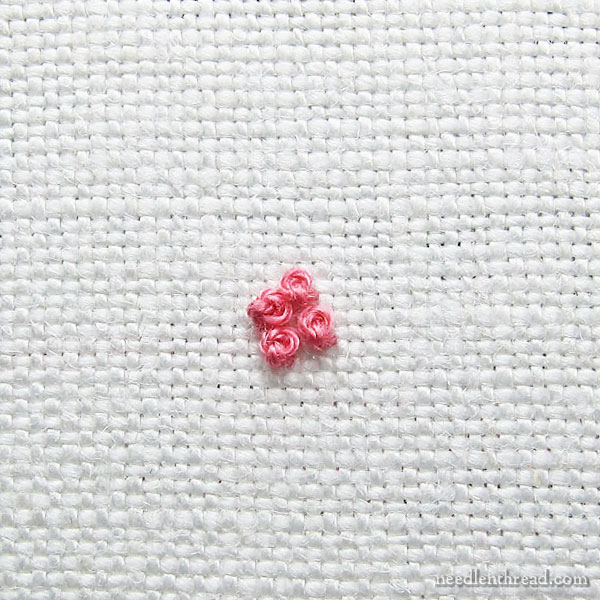
It's time to overcome, once and for all, the Fear of French Knots – to achieve mastery over this tiny bump of an embroidery stitch, to claim it as your own, so that each French knot you make for the rest of your life is a successful French knot.
French knots are one of the most frequently used embroidery stitches. I rank it right up there among my Top Ten embroidery stitches you should know. Nothing adds a dot or a bump – or creates a whole carpet of textured filling – quite like a French knot does.
So it’s definitely worthwhile to take the time to master the little booger!
If you aren’t perfectly satisfied with your own French knots, here’s a refresher course so that you can create perfect French knots with ease.
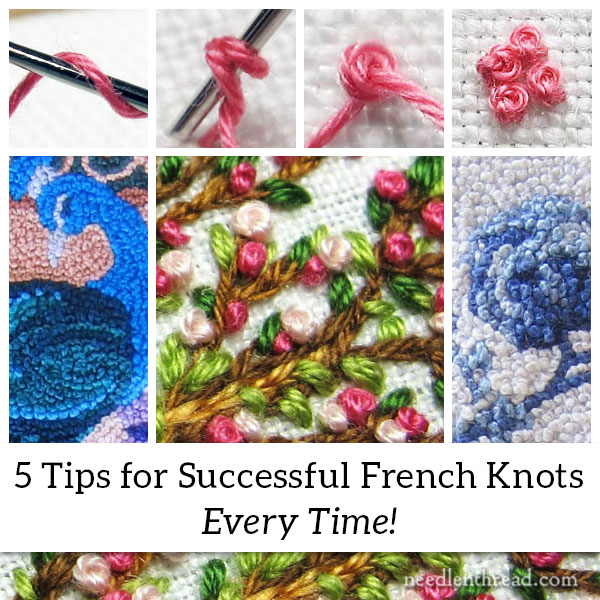
How to Make French Knots in Embroidery - 5 Tips
Before we get into the nitty-gritty on French knots, you might check out my how-to video for French knots here. Sometimes, seeing a stitch worked out in video is a good place to start. Once you understand the movement of the stitch, the little nuances that help make the stitch successful are easier to adopt.

Common Difficulties with French Knots

Some of the difficulties that you might run into with French knots include the following:
1. The working thread knots up before it’s pulled through the wraps on the French knot. Once the working thread is knotted, it’s hard to get even a simple slip knot out, because of the wraps, so the whole thread has to be cut.
2. The resulting French knot comes out lopsided or loose on the fabric.
3. The whole French knot pulls through to the back of the fabric as you end the stitch.
4. The knot is too small and tight.
If you follow the tips below, you’ll avoid these difficulties and your knots will turn out great! As with any stitch (or pretty much any endeavor!), practice is the key. The more you practice the stitch, the easier it will become and the better the results.

Tip #1: Number of Wraps

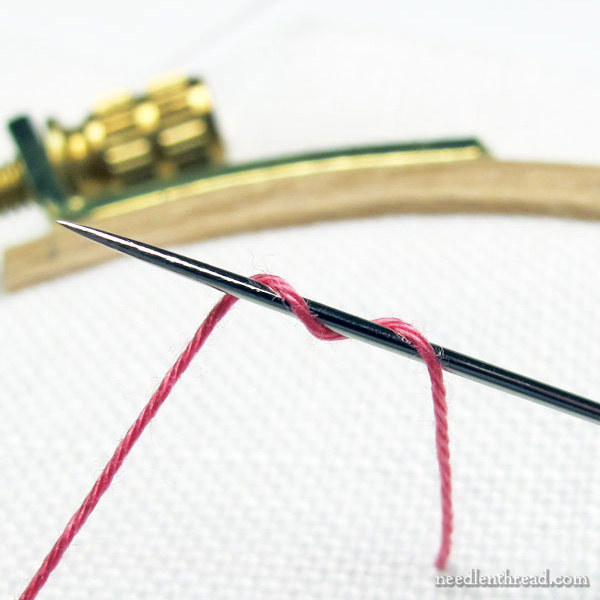
When you set out to make your French knot, consider the number of wraps that you’ll use on the needle.
How to Make French Knots in Embroidery - 5 Tips
Stitch dictionaries vary on this subject, and pretty much every stitcher ends up sticking with a preferred number of wraps.
In some instructions, you’ll see one wrap, two wraps, or three wraps around the needle.
When I make a French knot, I wrap my working thread around the needle twice. I know many stitchers who prefer three wraps, and that’s ok, too!
But I have seen a lot of examples of flamboyant knots out there, where the creator advises “as many wraps as you want” – using up to four or five, or even more! If you’re going for a sloppy look in your knots – if you want, for example, looseness and irregularity – go for it!
But if you want a nicely balanced, regular, consistently shaped, neat knots, don’t wrap beyond three wraps on the needle. The loops can end up loose, they can snag, and they will definitely end up irregular.
I prefer two wraps. If I want a heavier knot or a tinier knot than the two wraps will produce, I change the weight of my thread.

Tip #2: Leave a Space

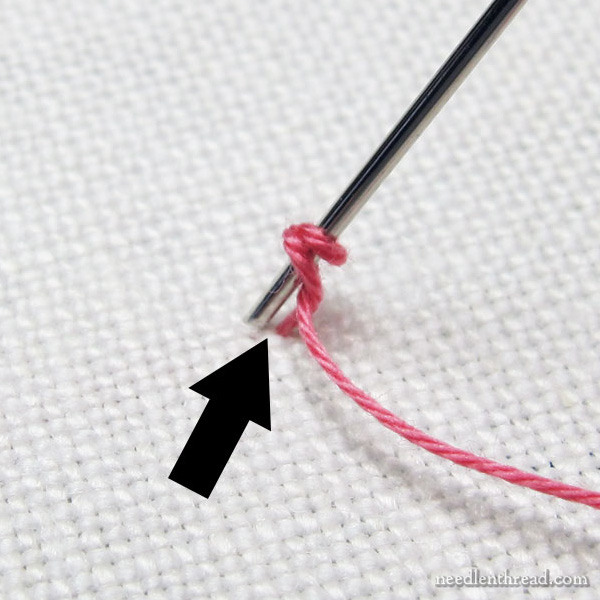
You might be under the impression, when you make a French, that the needle and thread go to the back of the fabric down the same hole they came out of to start the stitch.
If you go down the same hole, this is where you run into problems with the knot pulling to the back of the fabric.
How to Make French Knots in Embroidery - 5 Tips
So instead of taking the needle and thread to the back of the fabric through the same hole, always leave a little space. That space will ensure that your knot sits up on the fabric where it should!

Tip #3: Tension

You want the wraps to hug the needle, but you don’t want them to choke the needle to death! Hold the working thread so that the wraps are snug on the needle, but not so tight that the thread thins out and loses its natural plumpness. If you’re really pulling tight on that working thread to keep the wraps on the needle, it’s harder to pull the needle through and your knot will end up looking skimpy.
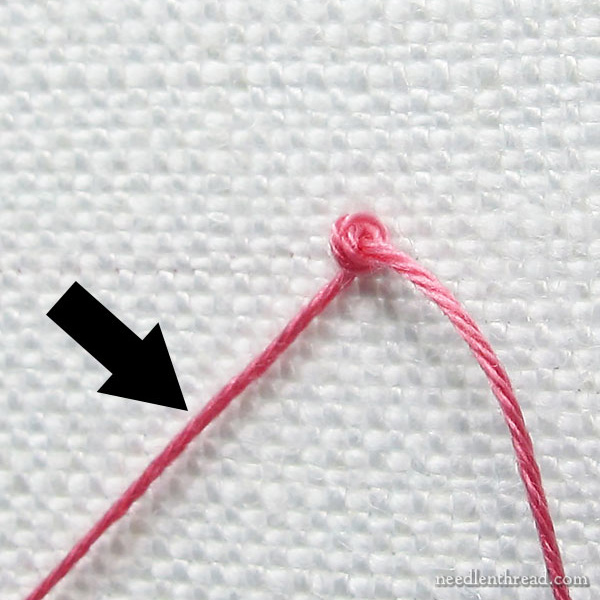
So, once you begin to pull the working thread to the back of the fabric while forming the knot, keep a constant, even tension on the working thread on the front of the fabric.
How to Make French Knots in Embroidery - 5 Tips
In the photo above, I’m holding onto that working thread on the front of the fabric, using a finger or two of the hand that’s holding my hoop.
You want to keep that tension on the thread until the last possible moment, when you only have about an inch or so left to pull through the wraps.
This will ensure two things:
a. that the wraps don’t come undone; and
b. that your thread won’t knot!

Tips #4: Slow Down!

While you’re pulling the thread through, pull slowly – especially after you’ve let go of the working thread.
Yanking the thread through quickly can result in a misplaced or oddly shaped knot and perhaps even one of those rascally slip knots. So take it easy as you pull the thread through.
How to Make French Knots in Embroidery - 5 Tips

Tip #5: The Needle and The Alternate

If you’re going to be working a lot of French knots, consider investing in a range of sizes of milliner (also called “straw”) needles. These needles have a long shaft with an eye that is the same size as the shaft. This helps the needle pull through the wraps more easily.
The milliner needle is used especially for bullion knots, but if you’re working a bunch of French knots, it can come in handy.
You can read more about milliner needles (and other hand embroidery needles) in my article Hand Embroidery Needles: How to Choose Them and Use Them.
And finally, if the French knot still evades you after you’ve put these tips into practice, then you can always consider working the colonial knot in place of the French knot. Some folks have better luck with the figure-8 wrap of the colonial knot. You can find a video for colonial knot here.

French Knots in Hand Embroidery

There are lots of ways to use French knots in hand embroidery.
They’re probably most often seen as flower centers, as single accenting dots and so forth, because they’re perfect for those situations.
But you can also use them as the key component in a piece of embroidery.
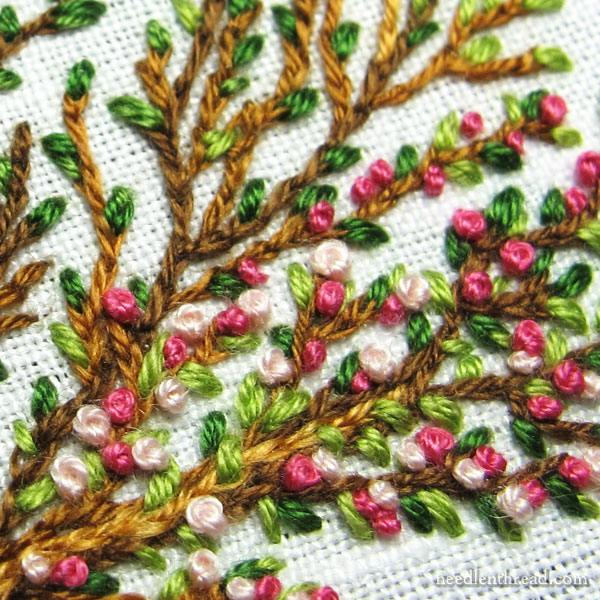
How to Make French Knots in Embroidery - 5 Tips
For example, in this spring tree above, I used them as the blossoms. They are the flowers, rather than just a little accent on the flower.
And some folks go much farther with French knots.
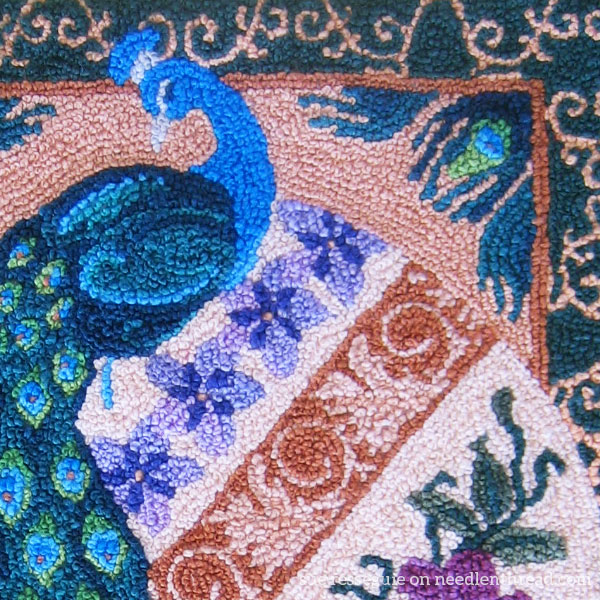
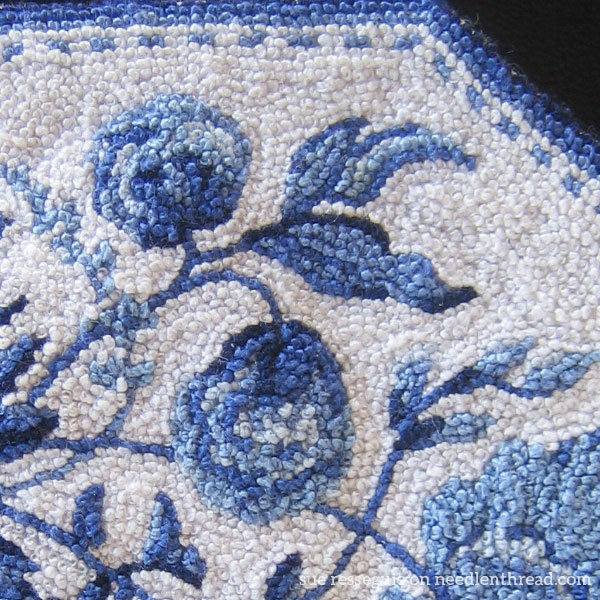
For example, Sue Resseguie’s miniature embroidered rugs are made entirely from French knots. They’re gorgeous!
How to Make French Knots in Embroidery - 5 Tips
This is an excerpt from a rug Sue embroidered in French knots, using a black and white coloring book page she found online, featuring a glorious peacock.
How to Make French Knots in Embroidery - 5 Tips
And this one – which melts my little blue-and-while-china-loving-heart – is an excerpt of a French knot masterpiece based on a design from a plate.
I’m pretty sure Sue is a master of the French knot! Aren’t they beautiful?

Practice!

Don’t give up on the French knot, if you’ve struggled with it in the past. Just a little practice, and you’ll get it! And once you’ve got it, it’s like riding a bike – you won’t forget, and it’s definitely worth it!
If you have any questions, comments or suggestions, feel free to join in the conversation below!


Home   |   How To Videos   |   Needlework Books   |   Patterns   |   Tips & Techniques |   Pictures  |  Shop
 
Contact Information: e-mail:
Follow me on Instagram: @needlenthreadmc
Follow me on Twitter: @MaryCorbet 
Find me on Facebook: Needle 'n Thread on Facebook
Find me on Pinterest: Mary Corbet on Pinterest


Sunday, November 19, 2017

Saint Nicholas hiding at the Thrift Shop

Saint Nicholas is a tricky old soul.  I found him last month at the Thrift Shop taking a long winter's nap before his busy season.  He had convinced the senior ladies there that he would be safe from exposure if they put a price tag on him and hung him from the wall.

Well there are some super sleuths in the world and I happen to be one of the lucky individuals that was gifted with super keen discernment.  I discerned $40.00 was way too much money even though he was divinely stitched and elegantly framed.  The frame has a few dings in it which I will try to cover up.  I held my breath and waited for Saint Nicholas to go on sale.  Friday, November 17th was half price day.  The shop opens at 9:00a.m. and I had to be at work at 9:30a.m.

I ran a reconnaissance mission Thursday afternoon and the Saint was still undiscovered hanging up, although his snores should have awakened the dead.  At 8:45a.m on Friday I slowly drove up to the target scoping out the parking lot, no one was there.  I skillfully backed my car into the nearest parking spot for a quick get away.  At 0850 another car pulled into the lot so I covertly slid out of the car and casually sidled up to the front door.  Moments later, no more then 10 ladies lined up behind me.  I slyly sized each of them up and decided I had at least 150 pounds over each of them.  I could easily push and bump any of them out of my way should the need arise.

At 0855 I spotted a lady inside the shop dragging a 50% sale sign up to the front doors.  As she unlocked the doors and was pulling it out and I asked if the shop was now open.  Her response had a steely edge to it, "oh why not?"  In I charged, faded to the right 4 feet and with blinding speed and skill snatched the unawares old man off the wall and made a quick jog to the check out, handed the elderly lady at the register a crisp twenty dollar bill and exited the door before anyone was even aware of what had just happened!

I flew to my car and slid Saint Nicholas into the front seat and triumphantly glided the vehicle out of the parking lot and got all the way to work without raising a single eye brow.  Saint Nicholas is hanging on my front room wall, blissfully unawares and still sleeping.  Won't he be shocked on December 24th he opens his eyes and he isn't where he thought he was?

So here is Saint Nicholas, designed by Stoney Creek from their Classics Collection published in 1995.  I would like to thank Eva Rideout on Stitch Maynia for helping me identify this beautifully stitched and framed treasure.  I wish I know who had stitched him.